Setting Up Rotators
Setting Up Affiliate Offer Rotator
Step #1 – Login to your Clickmagick & Click on the “Rotator” on the top menu
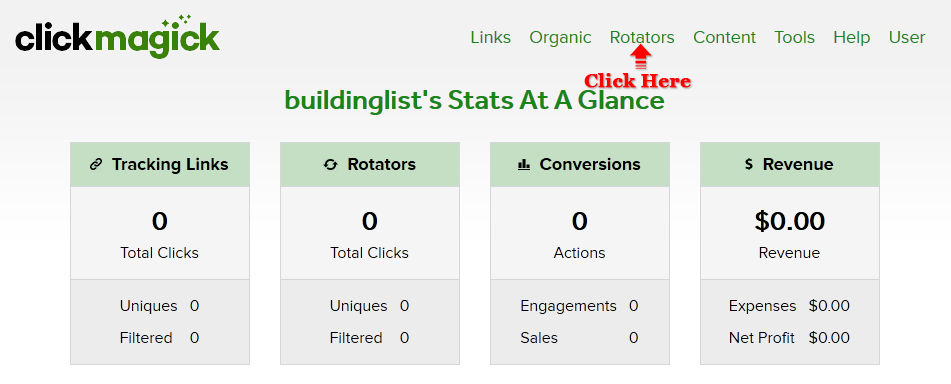
Step #1 – Login to your Clickmagick & Click on the “Rotator” on the top menu

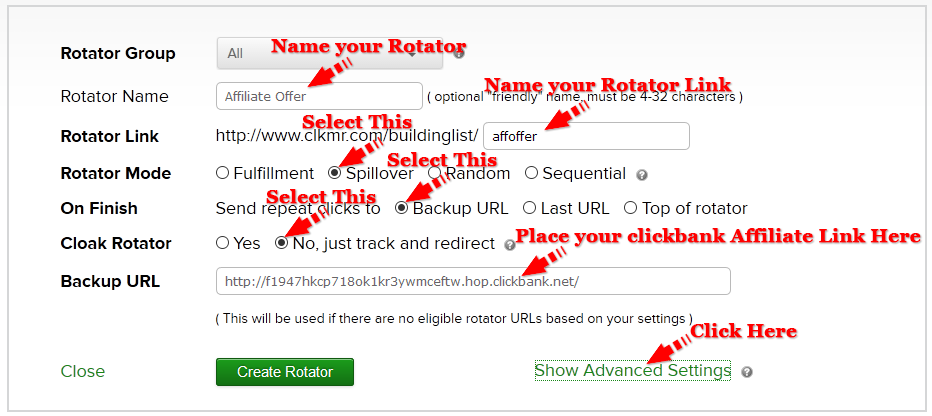
Step #3 – Fill in the “Rotator Name” as “Affiliate Offer” or anything you preferStep #4 – Fill in the “Rotator Link” as “affoffer” or anything you preferStep #5 – On “Rotator Mode” Select “Spillover”Step #6 – On “On Finish” Send repeat clicks to: Select “Backup URL”Step #7 – On “Cloak Rotator” select “No, just track and redirect”Step #8 – On “Backup URL” head over to clickbank.com, grab your affiliate link then place it here. If you do not have an account, create one, it’s free.Step #9 – Once complete, Click on the “Show Advance Setting”
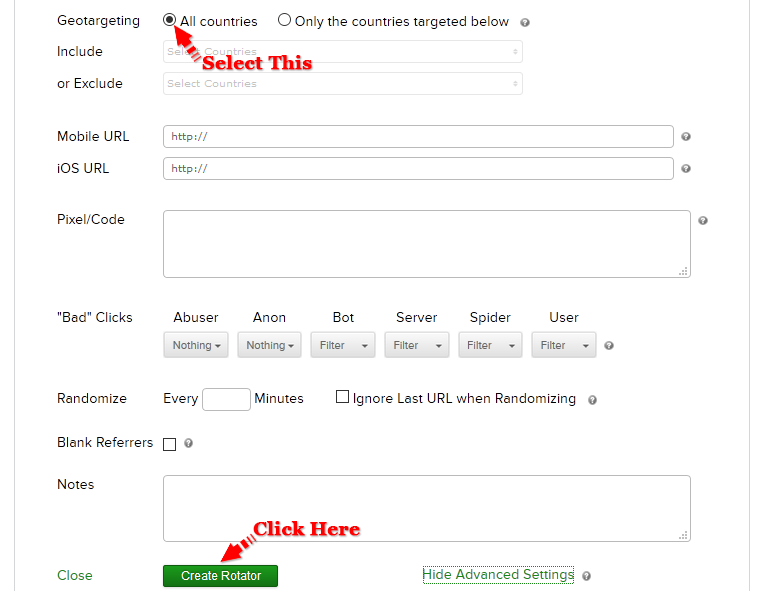
Step #10 – On “Geo Targeting” Select “All Countries”Step #11 – Once complete, Click on the “Create Rotator” Button
Setting Up CPA Offer Rotator
Follow Step #1 to Step #7 on setting up “Affiliate Rotator”
Step #8 – On “Backup URL”, grab your “Affiliate Offer Rotator link”, then place it here.
Please refer to the screen shot below where your “Affiliate Offer Rotator” link is located. You might need to scroll down a little bit if your computer screen is small.
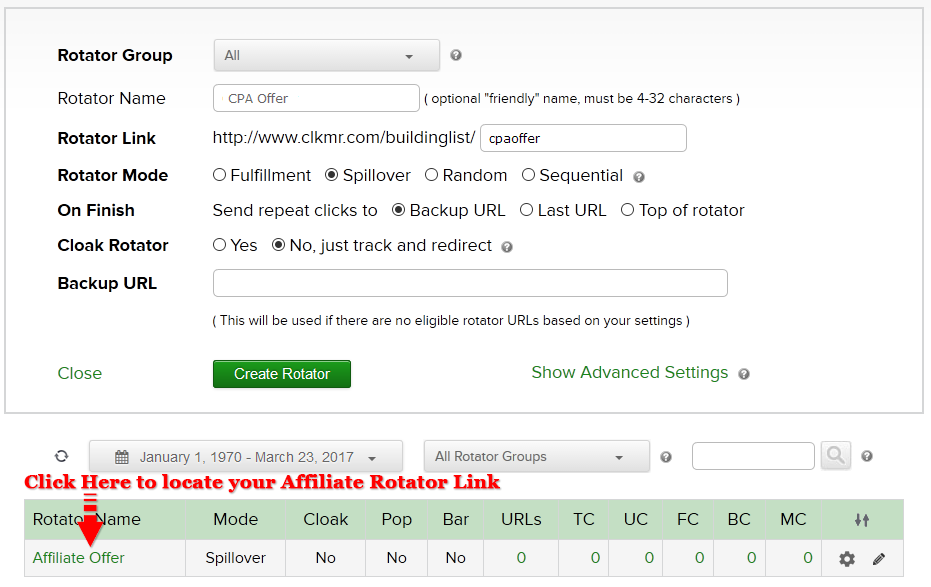
Once you click on the “Affiliate Offer”, it will expand as shown below
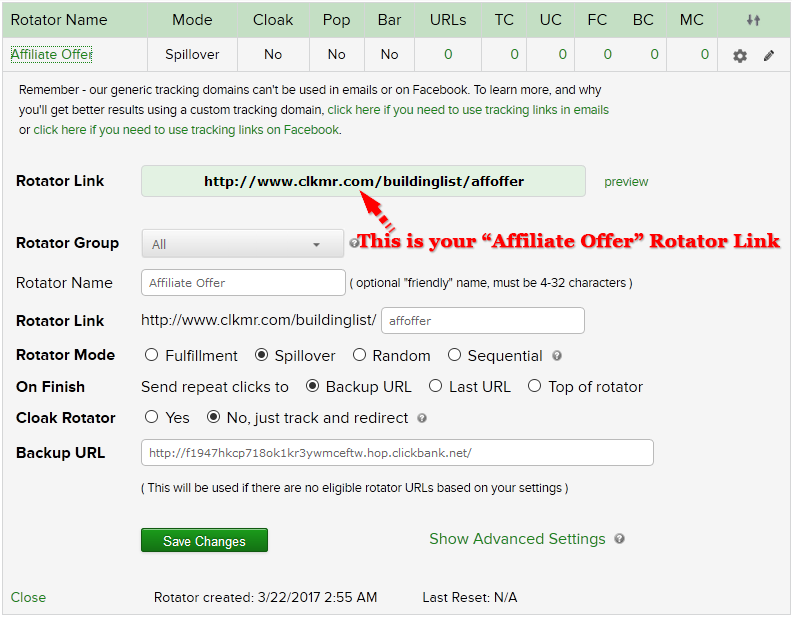
Copy the “Affiliate Offer” rotator link and paste it on your “Backup URL” for your “CPA Offer” Rotator. Once done it will look like below
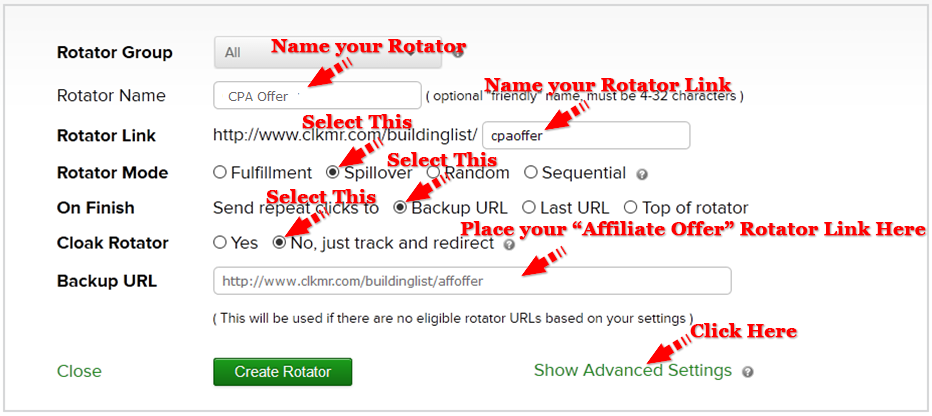
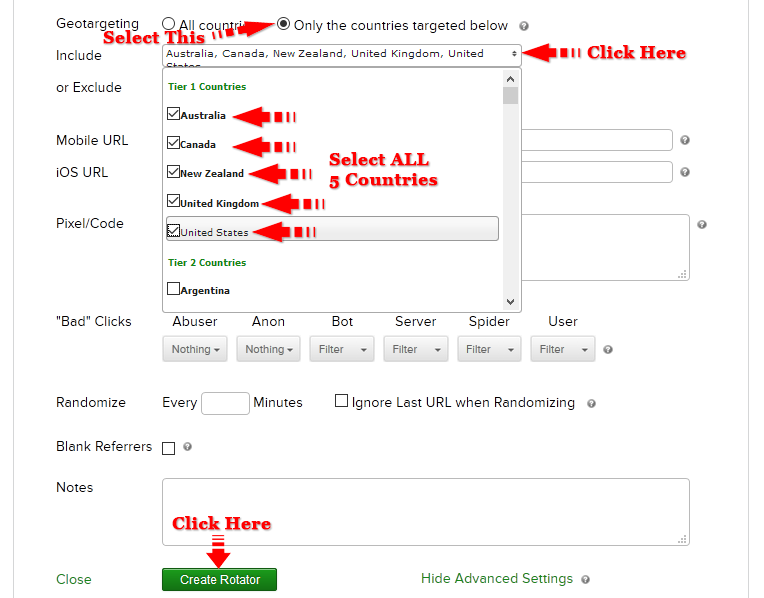
Step #9 – Once complete, Click on the “Show Advance Setting”Step #10 – On “Geo Targeting” Select “Only the countries targeted below”Step #11 – Click on the “Include” and the dropdown menu will appearStep #12 – Select all the 5 Tier 1 CountriesStep #13 – Once complete, Click on the “Create Rotator” Button
Gratz! You’ve created your CPA Rotator
Setting Up PPL Offer Rotator
Follow Step #1 to Step #7 on setting up “Affiliate Rotator“Step #8 – On “Backup URL”, grab your “CPA Offer Rotator link“, then place it here.Please refer to the screen shot below where your “CPA Offer Rotator” link is located. You might need to scroll down a little bit if your computer screen is small.
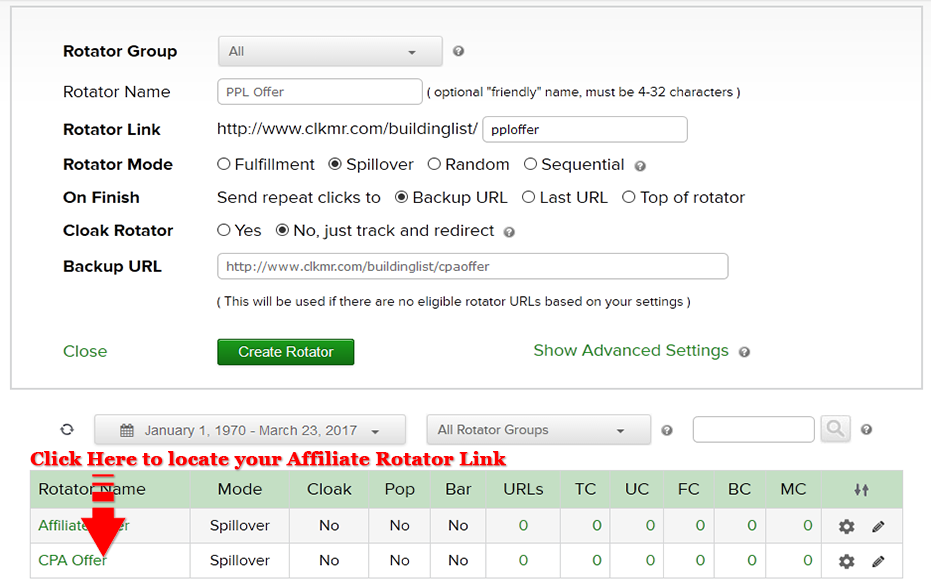
Once you click on the “CPA Offer”, it will expand as shown below
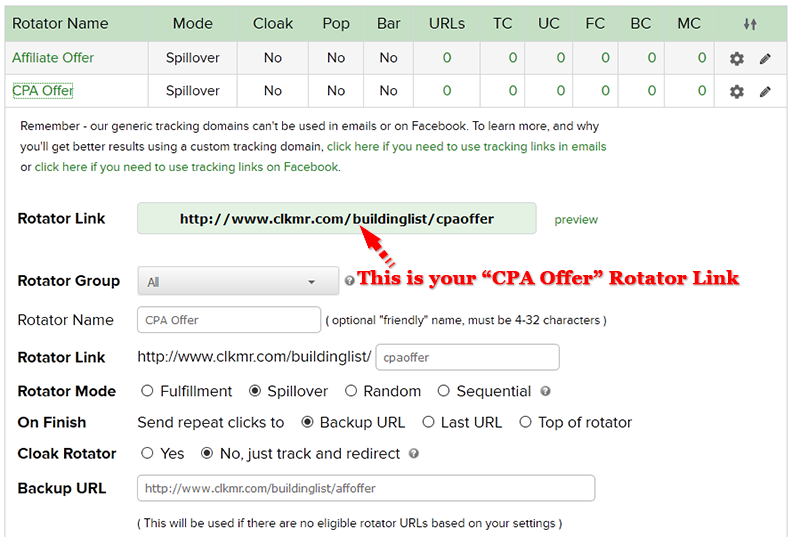
Copy the “CPA Offer” rotator link and paste it on your “Backup URL” for your “PPL Offer” Rotator. Once done it will look like below
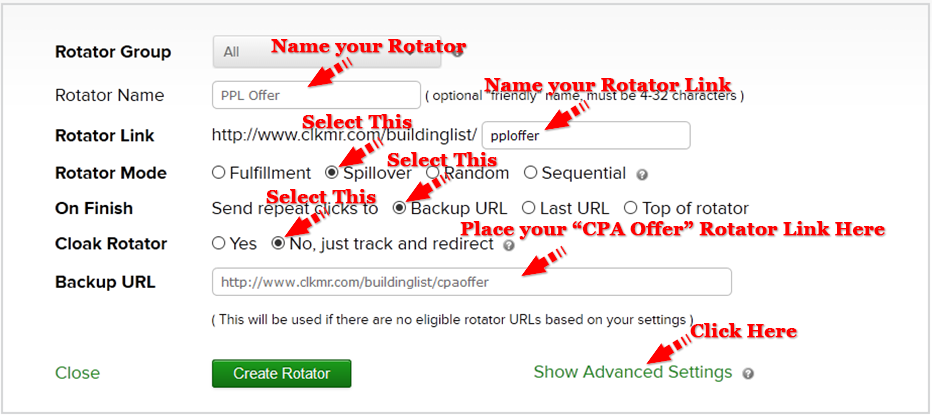
Step #9 – Once complete, Click on the “Show Advance Setting”Step #10 – On “Geo Targeting” Select “Only the countries targeted below”Step #11 – Click on the “Include” and the dropdown menu will appearStep #12 – Select all the 5 Tier 1 CountriesStep #13 – Once complete, Click on the “Create Rotator” Button

Gratz! You’ve created your PPL Rotator
MODULE 1
List Building Strategy
- Introduction
- ClickBanking
- Setting Up Funnel
- Banking: The Real Fun Begins
- FB Group: Testimonial, CB & Solo Ads
MODULE 2
Setting Up ClickMagick
- Registering ClickMagick Account
- Setting Up Rotators
- Populating Rotators with Offers
- Setting Up CB Rotator, Links and Action Pixel
MODULE 3
Setting Up Aweber
- Registering Aweber Account
- Creating Aweber List
- Creating Aweber Webform
- Creating Buyers List And List Automation
- Creating First Follow Up Series
CLAIM YOUR FREE DONE FOR YOU FUNNEL SETUP HERE
THE BAIT
FREE BUYERS LIST

